Introduction
In the dynamic environment of IT and data protection, technologies and solutions evolve rapidly, often leading to shifts that require businesses and service providers to adapt. Recently, the announcement regarding the end-of-life (EOL) status for Arcserve OneXafe Solo has prompted Managed Service Providers (MSPs) to explore new avenues for ensuring their clients' data remains secure and recoverable.
At Cloud Ready Solutions, we've been closely aligned with Arcserve's offerings since 2014, appreciating the innovation and reliability they bring to the table. The OneXafe Solo device has been a key component for MSPs, offering a straightforward and effective solution for data protection. Recognising the need to adapt to these changes, we see this as an opportunity to explore alternative solutions that continue to provide exceptional value and security.
Exploring Alternatives: Nakivo and Arcserve SPX or UDP
For MSPs looking to transition from OneXafe Solo, three notable options present themselves: Nakivo Backup & Replication, Arcserve SPX and Arcserve UDP. Both solutions offer strong data protection capabilities, but they cater to different needs and preferences.
Nakivo Backup & Replication stands out for its versatility and efficiency, particularly in environments that require flexible deployment options and thorough data protection features. Its ability to create Immutable Repositories on the Solo device, coupled with advanced backup and replication capabilities, makes it an excellent choice for MSPs seeking to repurpose existing hardware while enhancing their service offerings.
Arcserve SPX offers a smooth continuation for MSPs already integrated into the Arcserve ecosystem, delivering reliable backup and disaster recovery for both physical and virtual environments across diverse IT infrastructures. However, it's important to note that transitioning to SPX means the OneXafe Solo hardware cannot be repurposed for this solution. For MSPs considering a solution that aligns closely with their existing workflows and Arcserve deployments, SPX represents a logical and efficient path forward, albeit with the understanding that new hardware will be required to implement SPX, moving away from the minimal hardware footprint offered by the Solo device.
Arcserve Unified Data Protection (UDP) stands as a complete solution for MSPs seeking an all-encompassing approach to data protection. Designed to support a wide array of environments, from physical and virtual to cloud-based systems, Arcserve UDP excels with its unified management capabilities, offering advanced features like automated disaster recovery testing, global deduplication, and scalable architecture. While transitioning to UDP may necessitate new hardware investments & Microsoft Server Licensing, departing from the OneXafe Solo's minimal hardware footprint, its strong, scalable protection across multiple platforms makes it an attractive option for MSPs prioritising extensive coverage and reliability in their data protection services.
Adapting to Change
The IT environment is no stranger to change, and the most successful MSPs are those that can navigate these shifts with foresight and flexibility. Whether opting for Nakivo Backup & Replication's innovative approach to data protection or leaning towards the familiarity and reliability of Arcserve SPX, the key is to choose a solution that aligns with your business objectives and client needs.
Conclusion
As we move forward, the end-of-life announcement for Arcserve OneXafe Solo is not just a challenge but an opportunity to reassess and enhance our data protection strategies. By considering the strengths of both Nakivo Backup & Replication and Arcserve SPX, MSPs can make informed decisions that ensure resilience, security, and continuity in their service offerings.
Why Repurpose Arcserve OneXafe Solo with Nakivo Backup & Replication?
Amidst the backdrop of Arcserve's EOL announcement for the OneXafe Solo, Nakivo Backup & Replication stands out for its ability to offer a smooth transition to a reliable, full-featured backup solution. Nakivo has a low hardware requirement, making it one of the few backup solutions that can make use of the low cost, low specification of the Solo devices.
Nakivo supports an extensive range of platforms, including virtual servers (VMware, Hyper-V, Nutanix AHV), physical servers (Windows & Linux), cloud environments (Amazon EC2), and SaaS applications (Office 365), making it a versatile choice for MSPs looking to repurpose their Solo devices.
Nakivo's user-friendly interface, combined with advanced features like deduplication, immutable storage, replication across multiple repositories (including local disk, NFS/SMB shares, and cloud platforms like Amazon S3, Wasabi, Backblaze B2, and Azure), and orchestrated DR testing with screenshot verification, enhances the Solo device's capabilities. These features ensure MSPs can deliver high-performance, efficient, and secure data protection services. By choosing to repurpose OneXafe Solo devices with Nakivo Backup & Replication, MSPs can not only navigate the challenges posed by the EOL announcement but also unlock new potentials for their data protection offerings, ensuring resilience and continuity in their service delivery. and reliable platform capable of supporting a wide array of environments including virtual, physical, and cloud platforms. Its compatibility with various hardware, combined with minimal hardware requirements, makes it an ideal software for breathing new life into Arcserve OneXafe Solo devices. This repurposing initiative not only extends the useful life of the Solo hardware but also ensures MSPs can continue to provide thorough data protection and disaster recovery services to their clients.
Why Nakivo?
In the world of data protection and disaster recovery, Nakivo Backup & Replication stands out for its thorough, efficient, and cost-effective solutions. Here are several compelling reasons why Nakivo should be the go-to choice for businesses looking to repurpose their Arcserve OneXafe Solo devices or seeking a reliable backup solution:
Advanced Feature Set: Nakivo offers a rich suite of features designed to meet a wide array of data protection needs. From high-speed backup and instant recovery to advanced replication capabilities, Nakivo ensures that your data is secure, recoverable, and accessible when you need it the most.
Superior Performance: With features like built-in deduplication and support for a variety of storage options, including local disks, NFS/SMB shares, and cloud platforms like Amazon S3, Wasabi, and Azure, Nakivo delivers exceptional performance. This efficiency is further enhanced by the software's ability to deploy quickly, ensuring minimal impact on your operations.
Cost-Effective Solutions: Nakivo provides significant cost savings without compromising on quality or features. With up to 50% lower total cost of ownership (TCO) compared to competitors, perpetual licensing options, and trade-in savings, Nakivo presents an economically viable solution for businesses of all sizes.
Immutable Storage and Replication: The inclusion of immutable storage and flexible replication across multiple repositories ensures that your backups are not only secure from ransomware attacks but also readily available across various environments. This multi-layered approach to data protection is essential for maintaining business continuity.
Efficient Storage Utilization with Deduplication: One of Nakivo's standout features is its advanced deduplication technology, which significantly reduces the storage footprint of backups. By identifying and eliminating duplicate data blocks, Nakivo ensures that only unique data is stored. This process not only conserves valuable storage resources but also reduces the bandwidth needed for backup operations. The deduplication feature is especially beneficial for businesses with large volumes of data or those looking to maximize the efficiency of their storage infrastructure. By integrating Nakivo Backup & Replication, organizations can achieve optimal storage utilization, leading to cost savings and improved backup and recovery speeds.
Orchestrated DR Testing with Screenshot Verification: Nakivo takes disaster recovery readiness to the next level with orchestrated DR testing and screenshot verification. This automated process allows businesses to validate their DR strategies efficiently, providing peace of mind and compliance with regulatory requirements.
Recognition and Reliability: Backed by high ratings from industry analysts and a 98% satisfaction rate with support services, Nakivo is recognised for its reliability and customer-centric approach. These endorsements reflect the quality and effectiveness of Nakivo's solutions.
Ease of Use and Automation: With a web-based interface, policy-based automation, and intuitive setup, Nakivo simplifies the complex tasks of data protection, making it accessible for businesses with limited IT resources.
Choosing Nakivo Backup & Replication for your data protection needs means investing in a solution that not only meets today's challenges but also adapts to future demands. Whether repurposing Arcserve OneXafe Solo devices or enhancing your current data protection strategies, Nakivo offers a reliable, efficient, and cost-effective path forward.
Preparing the Arcserve Solo Device
Given that the Arcserve OneXafe Solo runs a hardened version of CentOS 7.x, the preparation process for repurposing with Nakivo Backup & Replication can be streamlined, focusing on the software aspects and leveraging the underlying Linux environment. Awaiting your detailed steps to further refine the guidance for this specific scenario.
To prepare the Arcserve OneXafe Solo device for repurposing with Nakivo Backup & Replication, start by determining the device's local IP address. This is an essential first step to ensure you can access the device for further configuration and setup. You should be able to identify the Solo from your DHCP server or routers lease table.
For configuring and managing the Arcserve OneXafe Solo device in preparation for Nakivo Backup & Replication, you have two primary options for remote access: SSH (Secure Shell) and Cockpit, a web-based interface. Here's how you can proceed with each method:
Option 1: Using SSH
-
Open a Terminal or SSH Client: On your computer, open a terminal window (Linux or macOS) or an SSH client like PuTTY (Windows).
-
Connect to the Solo Device: Use the SSH command followed by the username (typically 'root' or another admin user created for the device) and the IP address you identified earlier. The command format is ssh username@ip_address. For example, ssh root@192.168.1.100.
-
Enter the Password: When prompted, enter the password for the username you're using to log in. If successful, you'll have command-line access to the Solo device, allowing you to proceed with any necessary configuration or setup for Nakivo Backup & Replication.
Option 2: Using Cockpit
-
Access Cockpit Through a Web Browser: Open a web browser and navigate to the Solo device's IP address on port 9090. The URL will look like http://192.168.1.100:9090, replacing 192.168.1.100 with the Solo device's actual IP address.
-
Log In: Use the same credentials you would for SSH access. Cockpit's user-friendly interface allows you to manage the system without needing to use the command line.
-
Navigate the Interface: Once logged in, you can explore various settings and tools available in Cockpit to manage the Solo device. This includes network settings, system updates, terminal access, and more, which can be useful for setting up the device for Nakivo Backup & Replication.
Steps to Log In Using the Claim Code:
-
Locate the Claim Code: Turn the Solo device over and look for the claim code on its underside. This code is typically printed on a label attached to the device.
-
SSH Login: If using SSH, initiate a connection with the command ssh root@<device_IP_address>, replacing <device_IP_address> with the actual IP address of your Solo device. When prompted for a password, enter the claim code.
-
Cockpit Login: For Cockpit, navigate to http://<device_IP_address>:9090 in your web browser, replacing <device_IP_address> with your Solo device's IP address. Use 'root' as the username and the claim code as the password to log in.
To prevent the Arcserve OneXafe Solo's default services from running, which is necessary for repurposing the device with Nakivo Backup & Replication, you can use the Cockpit web interface. Here's how to list, filter, and disable the autostart of Solo services:
1. Access Cockpit: Log into the Cockpit web interface by navigating to http://<device_IP_address>:9090 in your web browser. Use the root account and the claim code for login credentials.
2. Navigate to Services: Once logged in, look for the "Services" section in the Cockpit dashboard. This section allows you to manage system services running on the Solo device.
3. Filter Services: In the "Services" section, use the filter or search function to look for services related to the Solo device's default operations. Enter "spx" in the filter box to list all services associated with the Arcserve Solo's default functionality.
4. Disable Autostart: For each service listed from the filter, select it to view its details. Look for an option or button labeled "Disable" or "Disable Autostart" and select it. This action will stop the service from automatically starting when the device boots up. Repeat this step for each "spx" related service listed in the filter results.
5. Verify Changes: After disabling the autostart for all relevant services, you may want to verify that your changes have been applied correctly. This can usually be done within the same "Services" section by observing the status of each service you modified. Services should no longer be set to start automatically.
6. Reboot: Rebooting the Solo device to ensure that all changes take effect and that none of the disabled services start upon reboot. This can typically be done through the Cockpit interface under the "Restart" or "Reboot" options.
In order to make the Linux installation more usable, it is necessary to update the Linux Yum Update repositories. There may be multiple ways to do this, but I did the following:
Step 1: Backup Existing Repositories
First, back up the existing YUM repository configuration by copying the /etc/yum.repos.d/ directory to a temporary location like /tmp/repos. This allows you to revert any changes if needed.
cp -r /etc/yum.repos.d/ /tmp/repos/
Step 2: Remove Old Repository Files
Next, clear out the old repository files from /etc/yum.repos.d/ to make way for the new, default CentOS repositories. This can be done by deleting the contents of the directory, ensuring not to remove the directory itself.
rm -f /etc/yum.repos.d/*.repo
Step 3: Restore CentOS-Base.repo
Copy back the CentOS-Base.repo file to /etc/yum.repos.d/. This file contains the base repository configurations for CentOS, ensuring access to the primary package sources.
cp /tmp/repos/CentOS-Base.repo /etc/yum.repos.d/
Step 4: Enable Repositories
Using yum-config-manager, you enabled the restored or added repositories one by one to ensure they are active and available for package management tasks.
yum-config-manager --enable CentOS-Base.repo
yum-config-manager --enable base
yum-config-manager --enable extras
yum-config-manager --enable updates
Step 5: Refresh and Verify
After enabling the necessary repositories, you likely refreshed the YUM cache and verified that the system could successfully access and utilise these repositories for package installations and updates.
yum clean all
yum makecache
yum update
This process ensures that the OneXafe Solo device is correctly configured to use the standard CentOS repositories, facilitating the installation of software like Nakivo Backup & Replication without being hindered by outdated or Arcserve-specific repository configurations.
With the CentOS repositories now correctly configured and enabled on your Arcserve OneXafe Solo device, you're set to install essential utilities that can aid in managing the system and downloading necessary files. Two such utilities are wget and nano, where wget is a command-line utility for downloading files from the web, and nano is a user-friendly, command-line text editor. Here's how you can install them:
yum install wget -y
yum install nano -y
Installing Nakivo
Here's a step-by-step guide you can follow to download and prepare for the installation of Nakivo on the Solo:
Visit Nakivo Download Page: Open a web browser and go to the Nakivo trial download page at https://www.nakivo.com/resources/download/trial-download/?utm_source=CloudReadyAU
You will need to provide some details to access the download link. You will be presented with multiple download options..
If your Solo device has access to the internet (which it should if you were using Arcserve cloud services, then simply copy the download link for the Linux Installer.
It should be similar to the following:
Head over the Solo’s terminal, navigate the tmp folder & use the newly acquired wget command:
wget “url to download”
e.g.
When the download is complete – run:
chmod +x NAKIVO_Backup_Replication_v10.11.0.80830_Installer-TRIAL.sh
Run the installer with:
sudo ./NAKIVO_Backup_Replication_v10.11.0.80830_Installer-TRIAL.sh

The Arcserve OneXafe Solo's Cockpit makes administration a breeze.
Accept the license agreement & continue.
You are then presented with the option to install various “solutions”
Full Solution (single tenant)
Full Solution (multi-tenant)
Transporter only.
The selection to make depends on you intentions for the installation and the type of licensing you wish to use going forward – contact Cloud Ready for advice on license choices.
The Full Solution (multi-tenant) install is NOT appropriate for the Solo device. This type of installation is designed for the centralised management of multiple clients & should be installed at an MSP’s own datacenter or cloud.
The Full Solution (single tenant) provides the full administration and functionality of Nakivo on the Solo. This option will install the Director and Transporter service on the Solo & provide a full self-contained and managed backup device. Management can still be delegated to an MSP’s remote “multi-tenant” console if required.
The Transporter only installation will install the Transporter role only. The Solo will be managed remotely (from a Director) & it will be used to perform backups, replication and can host repositories on local disk or cloud.
For the first “getting to know Nakivo” installation, I suggest to install the Full Solution (single tenant).

Choose which Nakivo solution to deploy
Accept the defaults for the installation/

Nakivo Installation Complete - Easy As!
Done – Nakivo is installed!
Managing Nakivo & Populating the Inventory
Browse to the management page of the Nakivo installation:

Https://ipaddress – will redirect to https://ipaddress:4443/c/login
The Nakivo Welcome Screen
Provide your details. The email address provided here will be the default used for email alerts and logging support tickets from within the console.
Click on Create Account (note this is an account on the local Nakivo installation only).
Populating the Inventory
On first login, the Nakivo console will default to the Inventory Page. The inventory will be empty. It is essential to add a resource to the inventory before progressing.

Nakivo Inventory
Click the + icon in top right of inventory.
Choose what item you would like to backup.

Add Inventory Item
I will choose Virtual as I want to backup some VM’s running on VMWare.

Add a Hypervisor
I will choose VMWare vCenter or ESXi host. Notice that Nakivo also supports HyperV, Nutanix AHV clusters and VMware Cloud Director.

Add vCenter credentials
The vCenter will be scanned & it's resources detailed.

vCenter is now detailed in the Nakivo Inventory
Click Next until you get to the Repositories section..
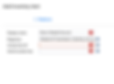
You will see that that (when the Full Solution installation was selected), a local “Onboard Repository” was created on the Solo’s base disk. At 43GB it is not very useful.
Use the 3 dots to access the dropdown action menu & select “remove”.
New Repositories can be created using the + icon in the upper right.

Create New or Add Existing Repository
Create New Immutable Backup Repository
We can now go ahead and create a new, larger repository on Local Disk (if present in the Solo), CIFS share, NFS share, Cloud & S3 Compatible Storage (Amazon S3, Wasabi, Backblaze, Azure Blob, Amazon EC2, S3 Compatible (StoneFly etc), or Deduplication Appliance.

Create Backup Repository on Multiple Media
I have added a 2TB disk to my Solo, so I will create a repository on Local Folder. (Tip, use the Cockpit – Storage page to simply add storage to the Solo).
After mounting a disk, it is important to grant Nakivo access to it using the command:
sudo chown -R bhsvc:bhsvc /mnt/backups

Create Local Repository
On the Options page, select:
Data size reduction – Enabled, Compression level Fast.
Store backups in separate files (recommended) is checked by default. Deselect this option if you want to enable Deduplication of the backups. Note, enabling deduplication will prevent the use of Immutable backups.
Other options are more advanced options for consideration another day.
Click Finish to create the Local Repository.
Create Backup Repository on Cloud (Wasabi)
Lets create a 2nd Repository on Wasabi..
Select Cloud & S3 Compatible as the Repository type. Choose Wasabi.
Click Add new Account – this will open a new tab in the “Add Inventory Item” with Cloud Storage Selected. Hit Next – Wasabi will be preselected – it next – Add Wasabi details..
Add Cloud Account
The inventory will be updated with the Wasabi account.

Wasabi Account is now added to Inventory
Back to the “Create Backup Repository” browser tab, we can now select the new cloud account, select our region and select a bucket.
When creating a bucket within Wasabi, if you want to enable Immutable Storage, you must enable Bucket Versioning and Object Locking when the bucket is first created.

Create an Immutable Bucket in Wasabi
Note – if you create a bucket AFTER adding the Cloud Account, you should “refresh” the cloud account within the inventory, so the new bucket is detected.

Create the Cloud Repository
You now have an infinite capacity repository on Wasabi!!

Infinite Capacity Wasabi Repository Now Available
Creating the First Backup Job..
Now that our Inventory is populated, we can create a Job.
Select Jobs from the side bar menu. Then click the + icon to create a job.
We are now presented with multiple job creation types, however only the job types suitable for our inventory are clickable:
Backup for VMWare
Replication for VMware
Real-time replication for VMware
Site Recovery

Nakivo Job Wizard
Backup jobs for Amazon EC2, HyperV, physical machines, Nutanix AHV, Microsoft 365, Oracle Databases, VMWare Cloud Director and file shares will become available when these items are added to our inventory.
Backup Copy is not yet available as no backup jobs have been created. We will come back to this after a backup has completed.
Select Backup for VMware. Select the VM’s to backup, select the target repository (local disk or cloud repository). I am using local disk as I will follow this task up with a copy to the cloud. Select a Schedule. I won’t go into scheduling in this blog as it is very flexible and can be customised in many ways.
I will just highlight the option for “Immutable for X days” feature.

Nakivo Backup Schedule
Click next to get to the options page. The defaults here are fine and certainly not for discussion in this post. There are several powerful features including VM verification with screenshots taken of “test recoveries”.
Click Finish & Run!. The first backup to the Nakivo “Solo” will complete..
Offsite & Cloud Copy
We would not be adequately replacing the Arcserve Solo if we didn’t have a copy of the backup in the Cloud. We could have backed up directly to the Cloud Repository, but I prefer to have one backup on site and one in the cloud.
After the first backup is complete, we can create a Backup Copy Job.
Use the New Job Wizard & select Backup Copy as job type.

You can now select what you want to copy – Entire Group of Backup Jobs, Single Backup Job, or single node within a backup job. You have total flexibility for different node requirements.
Backup Copy Job - select Backups to Copy
The destination for the copy will now be the Wasabi based Repository created earlier.

Backup Copy Job - Destination "Cloud"
The Schedule can be manually created & is highly customisation. You may choose to copy backups late at night or on a particular day.
One great option is to Schedule After another job, i.e. after the backup job has completed. In the image below, I have selected 30 minutes after the backup has finished.

Backup Copy Job Schedule
I have also selected to keep the backup in Wasabi for 6 months and ensure immutability for 10 days. Click Finish or Finish & Run to continue. The first backup will be copied to the Cloud Repository and future incremental backups will be copied 30 minutes after backups completed.
Conclusion
The conclusion of our blog post highlights a transformative opportunity for MSPs through the repurposing of Arcserve OneXafe Solo devices with Nakivo Backup & Replication. This strategy not only capitalizes on existing investments by turning a cost into a free asset but also paves the way for scalable growth in remote office backup services. By using low-cost hardware solutions from Cloud Ready and taking advantage of support for Nakivo licensing and the Nakivo MSP program, MSPs stand to significantly reduce operational costs. This approach not only demonstrates fiscal prudence but also showcases an innovative mindset in adapting to market changes, ensuring MSPs remain competitive and resilient in a fast-moving IT market.
Take the Next Step with Us
At Cloud Ready Solutions, we're committed to guiding MSPs through this transition. If you're exploring your options and seeking a reliable, proven alternative to Arcserve OneXafe Solo, we invite you to book a Nakivo discovery session with us. During this session, we'll dive into how Nakivo can meet your data protection needs, ensuring a smooth and efficient transition.
For those interested in deepening their partnership and exploring the benefits of Nakivo further, consider signing up as a Nakivo partner. This partnership opens up a world of opportunities for MSPs to enhance their service offerings and deliver unparalleled value to their clients. Become a Nakivo Partner today and start your journey towards a more resilient and dynamic data protection solution.